Sunday, August 30, 2015

BATTLE CRY Variant AWI Wargame

       In the last few weeks I was working on several projects at once. One was painting a unit of 1st generation AWI British light infantry. After completing them I decided to try out some modifications on  BATTLE CRY rules, these being for the AWI. I found this variant on line a couple of years ago but never tried them out. For this game I used randomly placed terrain features and then rolled for which side they would enter from.  The Americans had 7 units, all were militia. The British had five units; three regulars, one light unit and one of grenadiers.
From behind the British line. The light infantry on the left will try to take the woods to their front, the grenadiers on the right will try to seize the house in front of them.

The American militia. They will grab the woods on their left, and the house on the right.


The British fire kills one militiaman, and force another to retreat.

The militia kills one infantryman. On the left one militia unit takes up position behind a stone wall.

One militia unit is eliminated. Another unit is forced to retreat. With these rules, if a militia unit gets a "flag", they must roll another dice. If the dice comes up as an "infantry", the unit routs off the field, as in this picture.

The British divide the rebels into two parts. In the upper left it can be seen that two units are forced to retreat. One unit falls back one hex, another unit routs off the field. 

A closeup from the above picture. The British have eliminated another militia unit.


A militia unit drives the light infantry from the woods. However, it is unaware of the infantry closing in on it's right flank.


The British try to clear the militia from the woods on their right, with no success. At this point in the game the Americans had lost over 50%, which is when I would end the game.However, I did want to see how the militia rules worked out, so I used Bob Cordery's rule where after losing 50%, the  American units couldn't advance towards the enemy, but could still fight.

The militia behind the stonewall forces one unit to retreat. The militia unit on the right manages to  turn back the British flanking unit.

The overwhelming British attack on the right finally clears the woods of the militia.  Although forced to retreat, this militia unit was not routed. 
The light infantry rallies and enters the woods again. Between the light infantry fire and the regulars  hitting from the flank, this stubborn militia unit is finally wiped out. The American general orders a retreat.


Closeup of the light infantry entering the woods. I like the looks of the 1st generation Minifigs  when painted and given a coat of high gloss lacquer.

The grenadiers at the end of the battle.

I think these rule variants have lots of promise and I will have to give them a better trial at a later date.


Friday, August 28, 2015

Molly; RIP

      The last few weeks I have gotten quite a lot of wargaming projects done. Earlier this week I was going to show some of the projects. Unfortunately, Molly, my dog, who has been sick for a few months, took a turn for the worse and so we had to put her out of her pain. Needless to say, I haven't been much in the mood for working on anything. However, Donna and I are trying to get out of the funk both of us are in.  I will at least try to do a report on an AWI game I played last week using some BATTLE CRY variant rules.
Molly playing "soccer" in the house.
One of the last pictures I took of Molly, having her  coat groomed.

Saturday, August 22, 2015

Imagination Ancients Wargame

     I have been looking for a map to use with my various wargames to give substance to my storyline. Somehow having invasions with no real goal doesn't make sense. Then I thought of the ESSEX, an American frigate during the War of 1812 that found itself fighting in a tribal war on the island of Nuku Hiva.  The island was made up of different valleys with different tribes in each valley. These tribes were continually at war with each other.  This description reminded me of a map in an old PRACTICAL WARGAMER magazine from campaign game called COCKPIT. This map is used quite often by solo gamers and I have used it myself.  The map itself is a hex divided 6 ways with various terrain and towns. I modified my map to break up the hex. And as I was thinking of this map, I received an order of Peter Laing Persians. I decided to do a narrative battle using this map and some of my ancients.

    On the island of Verdancia, the 6 countries that make it up were constantly at war with each other.  If one thought of the island as a pie, one would have to think of the pie being cut into six parts, each nation having a common border in the center of the island. That common border was on the top of a mountain. So if one wanted to invade one of the other countries that they didn't have a common border, they would have to invade by sea or by climbing this mountain. The Verdancians were poor seamen, so the mountain route seemed the best. However, ruling the Great mountain was the tribe of Obsidia, a tribe that rarely waged war. This was a good thing, because they had a reputation of viciousness in battle that so scared the other tribes that it had been generations since anyone dared fight them.

    Now the king of Verdancia was outraged with the king of Titania, the kingdom directly south of it. The King of Titania made a trade agreement with another island, part of the deal was the other island would not trade with any other kingdom on Verdancia. The King of Verdancia, Uaine, decide to invade Titania to stop this treaty. As the Titania fleet was stronger than his, he would march on Titania. This meant cutting through Obsidian territory. However, he had a secret weapon that would cow the Obsidians and they wouldn't interfere with his march.
The island of Verdancia. Verdancia is #1; Titania is #4. The cloverleaf in the center is the land of the Obsidians.

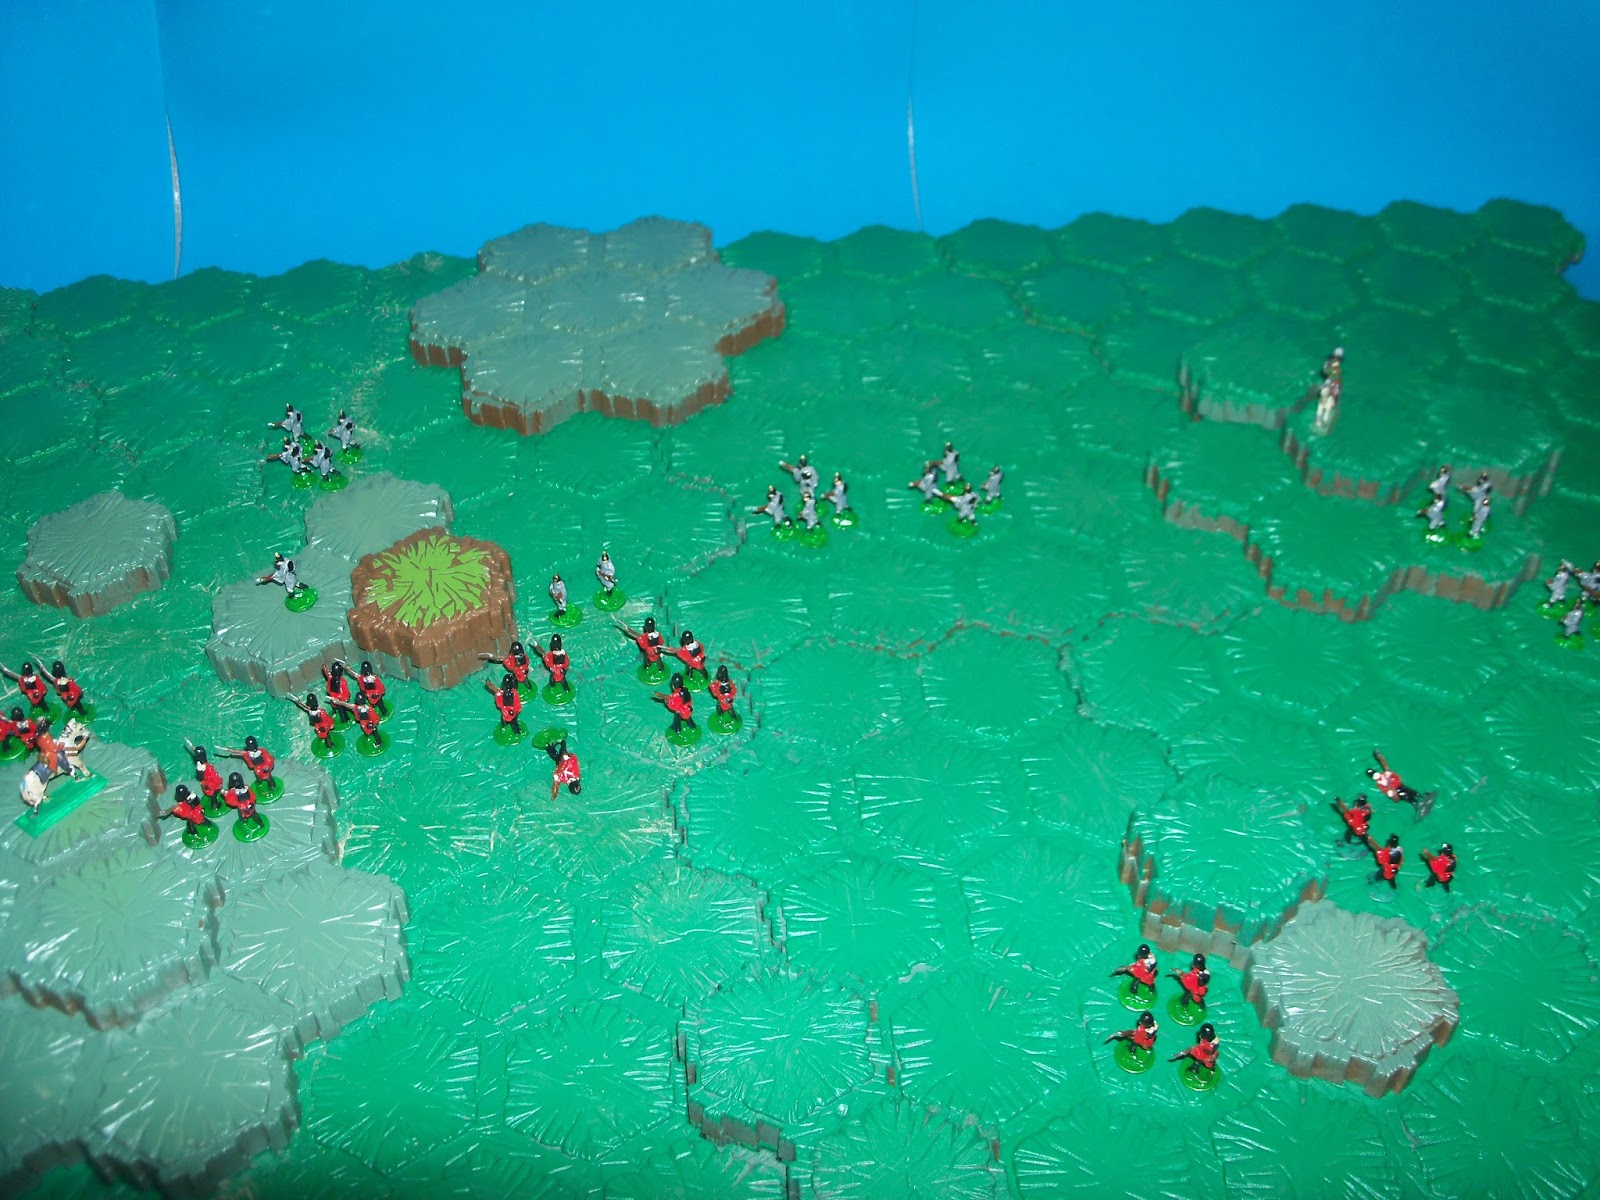
The Verdancia Army nears the pass which will lead to Titania. King Uaine sends a messenger to the Obsidian King saying that he wishes to pass in peace. The Obsidian King Dubh tells him that no army may pass through his lands. The Verdancians draw up for battle. Uaine hides his secret weapon; a unit of elephants!

What King Uaine sees of the Obsidian Army.

King Dubh hides a large force behind the hills.


The Verdancians send forward their archers. He shows the elephants to strike fear into the Obsidians hearts. 

King Uaine orders all his infantry forward. All are armed with bows and they start pelting the Obsidians with arrows.


King Dubh now starts feeding in his hidden troops.

The Obsidians close with the Verdancian Army, negating the archery  of the Verdancians.

Uaine sends forward the elephants, closely supported by his medium horse and bodyguard infantry (in yellow).

The Obsidians get over their initial shock of the elephants and dispatch half of the unit!  In the upper right of the picture is the unit of blue spearmen; these are the same figures that has been so successful in other games. In this game they have lost 3/4 for their men but still stand fast.

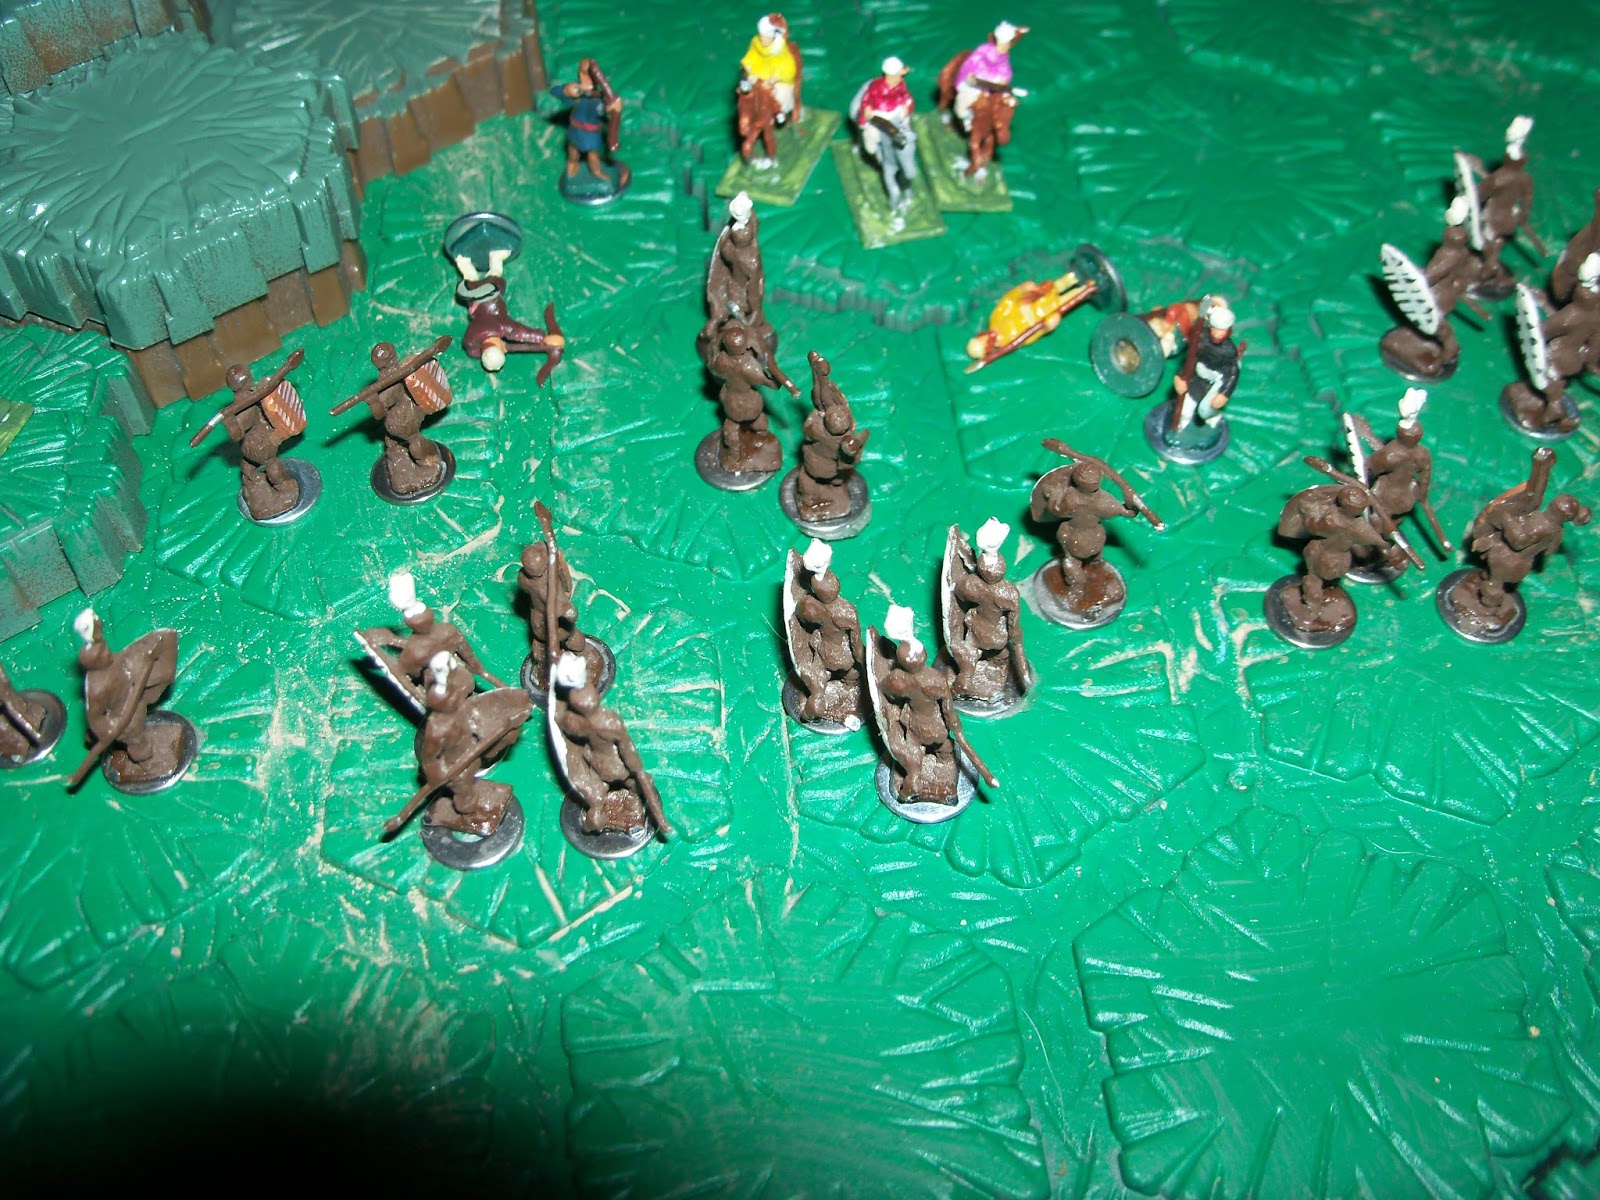
The Obsidians wipe out the elephants and put the medium cavalry to flight. The Verdancian center is in danger.

A closeup of the elephants defeat.

The Obsidians tactics call for them to engulf units. The blue spearmen fall to this tactic.They were surrounded with nowhere to go. This is the first time this unit has been defeated.

Uaine tries to consolidate his army.

The Obsidians use multiple units to attack individual Verdancian units, with great success.

The Verdancian right flank holds steady.

The medium horse tries to slow the Obsidians push in the center.

The Verdancian right forces back the Obsidian rush, giving itself a little breathing space.

But the Obsidian forces start infiltrating along the Verdancian line.

The Verdancian left flank is all but cut off from the rest of the army.

The beginning of the end of Verdancian Army. The Verdancians, fighting for their lives, do not realize that they are being cut off.

The Obsidians are trying to encircle the Verdancian center.


Only one archer and two cavalry is left of the Verdancian left.

While the Obsidians slowly eliminate the center, the sole surviving cavalryman on the left flees the field.

The Obsidians have overrun the center. King Uaine signals for the army to retreat.

These are the survivors of the Verdancian Army. (Man on horseback in yellow is King Uaine.)

King Uaine's bodyguard and medium horse find themselves surrounded and are forced to surrender.

I used Battlelore rules for this game. I arranged my room so I could view each side from behind, which I believe makes for a better game as you get a new perspective by seeing from the other side.

Saturday, August 15, 2015

Peter Laing Crimean Wargame

     The last couple of days I have been going through my Peter Laing figures. Among my first figures were Crimean War British Guards, which had been converted into 1700's British grenadiers. I converted them back to Crimean Guards ( whether successfully is another matter). I wanted to use them in a game. I found myself just not keen on any of my usual Peter Laing soldiers. I was about to give up when I took out some home cast Peter Laing Crimean Russian infantry in spiked helmets. I was never really happy with these casting and so never used them. I found I had painted enough for 7 units.  My attempts at casting Russian artillerymen was a failure, and what Peter Laing Russian cavalry I have are in no shape to be used. I was about to give up on the game completely, when I figured why not just a quick infantry battle. I could use the Battle of Inkerman from the Crimean War as inspiration.

I randomly set up terrain on the Heroscape board, then rolled to decide which side the forces would enter on.
The Russian are at the top, the British on the bottom. The British have 6 Guard units and one regular unit, which is on their right flank.

As the forces close, the Russian general realizes that his right flank is seriously outnumbered.

The British quickly push back the Russians right flank.

The Russian general sends 2 units to reinforce  his right flank.


The Russians hits the rightmost unit and wipes it out.

The British regulars start climbing the hill with the goal of trying to tie  up the leftmost Russian units.

The Russians, known for closing with the bayonet, closes on the Guards.

The British regulars attempt to distract the Russian left fails;one unit just marches under their guns to join the battle on the Russian right. The British attempt to form a new defensive line fails under the relentless Russian assault.

The Russians overrun two more Guards unit,and start assaulting up the hill towards the regulars.

The British regulars charge down the hill and push back the Russians. The Guard unit on the center hill manages to eliminate the Russian unit attacking them. At this point in the game the British have lost 3 units. To lose one more will spell defeat. The Russians have only lost one. By eliminating that unit, the Guards' honor has been saved.

The British general decides to save what's left of his command.

One big disadvantage of my current setup is that I see the field from one side only, which I think gives the force on that side an advantage. I want to work on my gaming table where I could see from both sides of the field.